Stippling: what it is, how to do it, and how to stipple a photo
Stippling is drawing with dots alone: more dots where it is dark, fewer where it is light. How it works, how to do it by hand, and how software does it.
Published
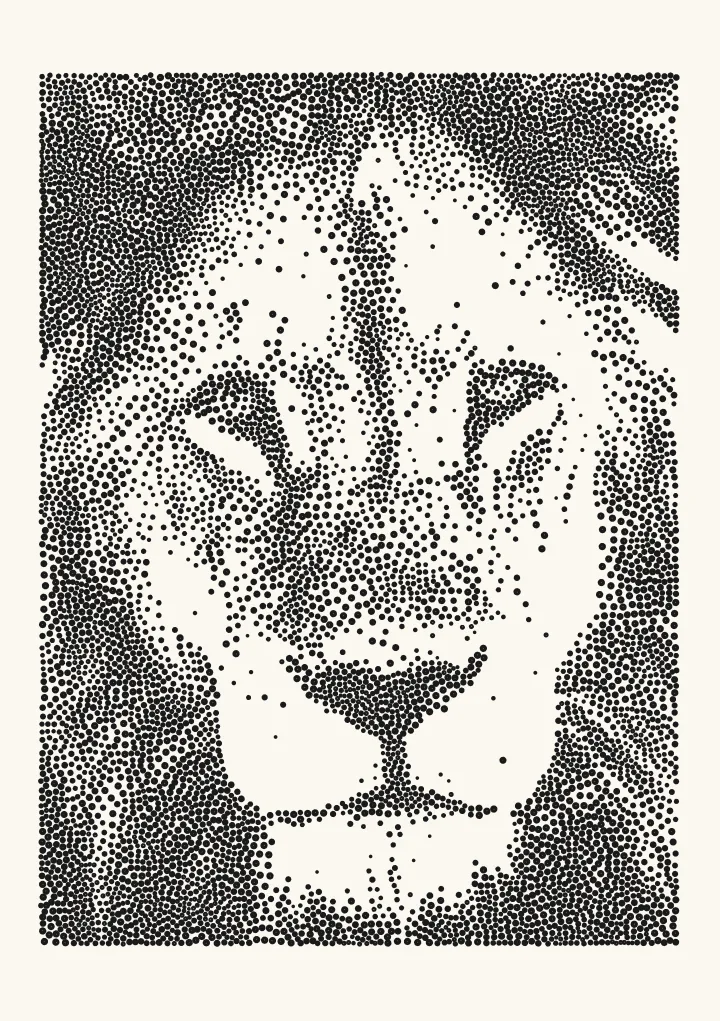

Sample render. Slide to compare the photo with the result.
Stippling is a way of drawing with dots and nothing else. There are no lines and no smudged shading: where the picture is dark the dots crowd together, and where it is light they thin out until the paper shows through. From a step back the eye blends the dots into smooth tone.
Every dot is the same colour, usually black, and in most stippling every dot is about the same size. All of the shading comes from how closely the dots are packed.
What stippling is used for
- Pen and ink illustration. Stippling gives soft gradations that hatching cannot, with nothing but a fine pen.
- Scientific illustration. Botanical and medical drawings were stippled for a practical reason: a drawing made of pure black dots survives cheap printing and photocopying, where grey washes turn to mud.
- Printmaking. Stipple engraving, popular in the late 1700s, built portraits from thousands of dots pricked into a copper plate.
- Tattooing. Dotwork shades with spaced dots instead of solid fill.
- Pen plotters and lasers. A machine that can only make one kind of mark needs a way to show tone. Dots are the simplest.
Stippling, pointillism, halftone and dithering
These four all build a picture from dots, and they are often mixed up.
| Technique | Dots are | Placed | Tone comes from |
|---|---|---|---|
| Stippling | One colour, one size | Freely, evenly spread | How close the dots are |
| Pointillism | Many colours | Freely, by the painter | Colours mixing in the eye |
| Halftone | One colour per ink, many sizes | On a regular grid | The size of each dot |
| Dithering | One colour, one pixel each | On the pixel grid | How many pixels are on |
Pointillism is the painting method of Georges Seurat and Paul Signac in the 1880s: small strokes of pure colour that the eye mixes. Stippling is about tone, not colour. A halftone keeps its dots in rows and changes their size; dithering is what a screen or a laser does with a fixed grid of pixels. Stippling has no grid at all, which is why it looks hand-made.
How to stipple by hand
You need a fine-liner pen and smooth paper. A 0.1 to 0.3 mm tip suits detail; 0.5 mm covers ground faster.
- Sketch lightly in pencil. Mark the outline and where the shadows fall. You will erase it at the end.
- Hold the pen upright and touch, don’t drag. A dragged pen leaves a dash with a tail. Dots should be round.
- Start with the darkest areas and place dots evenly across each one, not in rows. Rows and swirls show up as patterns once the drawing fills in.
- Build in passes. Go over the whole drawing again and again, adding dots where it needs to be darker. It is easy to add a dot and impossible to remove one.
- Leave the highlights as bare paper. The brightest part of a stippled drawing has no dots in it.
- Step back often. Stippling is made at arm’s length and judged from across the room.
It is slow. A postcard-sized portrait takes thousands of dots and several hours, and that patience is most of the craft. The usual beginner’s exercise is a sphere: one light source, a smooth run of tone from highlight to shadow, and a cast shadow underneath.
Common mistakes
- Dashes instead of dots, from working too fast.
- Outlines. A drawn edge looks out of place; let a change in dot density make the edge.
- Patches. Finishing one area completely before starting the next gives uneven tone. Work the whole picture at once.
- Going too dark too soon. Mid-tones need far fewer dots than they seem to.
How software stipples a photo
A computer can place the dots for you, and the good methods copy what a careful artist does: keep the dots evenly spaced, and let their density follow the tone.
The classic method is weighted Voronoi stippling, published by Adrian Secord in 2002. Start with dots scattered anywhere. Give each dot the patch of picture that is closer to it than to any other dot, then move the dot to the centre of darkness of its patch, and repeat. The dots drift apart from each other and towards the dark areas until they settle into an even spread with no rows and no clumps.
Plotcaster’s Stipple style uses a later refinement, LBG stippling, in which a dot whose patch holds too much darkness splits in two and a dot whose patch holds too little is removed, so the number of dots adjusts itself to the picture.
On the test photo at the top of this page, drawn on an A5 sheet, that comes to 7,826 dots, and about 83 minutes of plotting with a 0.3 mm pen. By hand it would be a few evenings.
Stippling a photo for a plotter or a laser
- Choose a photo with clear light and shade. Portraits lit from one side work best. Flat, evenly lit photos turn into an even grey field of dots.
- Dot spacing sets the detail and the time. Closer dots show more and take longer, because a pen lifts once for every dot.
- Dot size should match your pen. A dot smaller than the pen tip cannot be drawn smaller; a much larger one has to be filled in.
- For a laser, export a 1-bit PNG at the laser’s own resolution so each dot is burned once. See what DPI to use.
The same dots can also be joined into one continuous line that never lifts, which is called TSP art.
Questions
Is stippling the same as pointillism? No. Pointillism mixes colours; stippling shades with one colour. Both use dots.
What pen is best for stippling? A pigment fine-liner with a firm tip, 0.1 to 0.3 mm. Technical pens give the most even dots.
How long does a stippled drawing take? A small one, a few hours. Large detailed pieces run to tens of hours and hundreds of thousands of dots.
Can I stipple digitally? Yes: by hand with a round brush in any drawing app, or automatically from a photo with a stippling generator such as the Stipple style.